The ITarian Remote Access is a peer-to-peer communication tool that uses the secure RTP protocol to remotely connect to managed endpoints. The tool uses standard technologies and protocols so no additional software or hardware is necessary. You may download the software on our website. Also, this can be downloaded separately. It is not a requirement to register for an account in ITarian. You can freely download and use it with any of your preferred RMM platform.
Download and Install ITarian Remote Access Monitoring Software
Visit https://remoteaccess.itarian.com and click “Get Now for Free” at the top-right part of the website. Enter your email address and click “GetNow.” Then, click “Save File”.

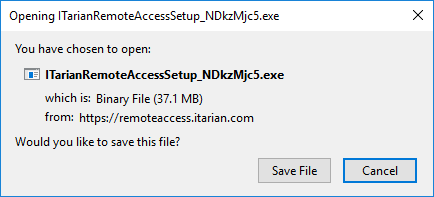
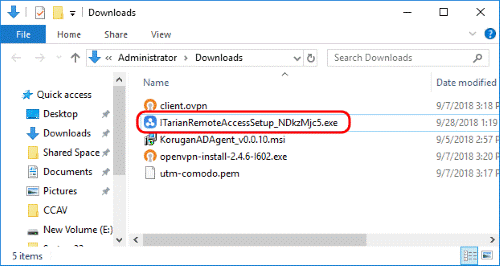
The setup file will be saved to your default download location. Please refer to the screenshot below. Run the setup file to start the installation process:
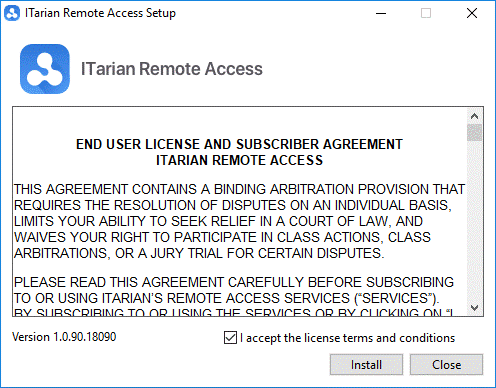
Read the license agreement, accept the license terms and click “Install”. It is important that you read the license agreement so you will know the terms and conditions when using the ITarian Remote Access Monitoring Software.
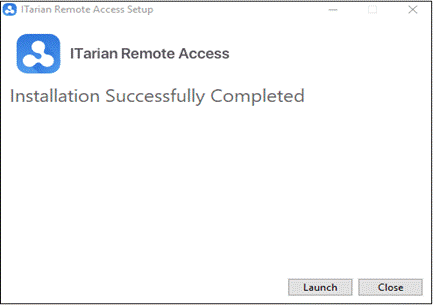
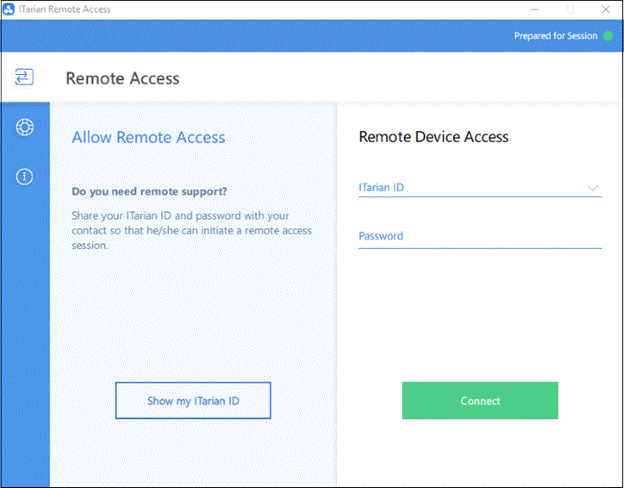
After installation, click 'Launch' to open the app. Here’s how it should look like:
After installation, ITarian automatically generates an ID number and password
Note: ITarian also needs to be installed on the endpoints you want to manage.
Make sure ITarian is also installed on the endpoint you want to manage. Then, you can proceed to open ITarian on your local machine and get your client to open ITarian on the device you want to manage. Get your client to send you their ITarian ID and password. Click “Start Connection”.

Enter the ID and password of the remote endpoint. Click “Connect”.
Note: The password is valid for the current session only. A new password is generated for every session.
The remote user will receive a connection request which he/she must allow
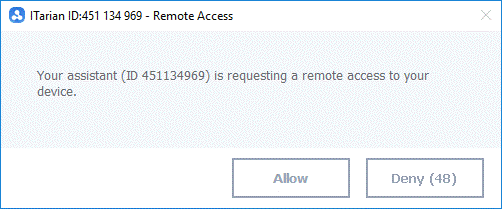
The user should accept within 60 seconds or the connection attempt will timeout. After accepting, the remote endpoint will show a dialog box with details of the connection:

You can now access the remote machine to perform tasks as required.
Now that you are done with connecting the endpoint, you will see the desktop of the remote machine in the ITarian window. You can use the remote access toolbar to manage your connection.
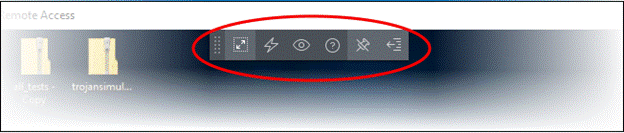
The following table lists the features you can use on the toolbar.
Click and drag the tool bar to your preferred location.

The remote desktop will cover your entire display, without the operating system's window-framing interface. Click the same icon to exit full screen mode

Lock the tool bar in place in full screen view.

Show/hide tool bar options.
Send control commands to the endpoint.
Send Ctrl + Alt + Del - Opens the Windows security screen on the remote device. This lets you:
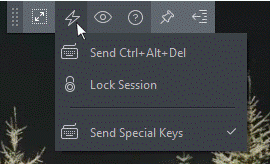
- Lock the remote computer
- Log the current user out of the remote machine
- Change the password of the remote machine
- View task manager on the remote machine
- Shut down/restart/hibernate the remote machine.
Locks the remote endpoint. Provide a password to unlock the endpoint.
Send Special Keys - If enabled, send key combination commands such as Ctrl+C, Windows + R and so on. Special key combinations depend on the operating systems of the local (admin) device and the remote device.
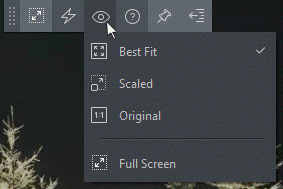
Change the display size of the remote desktop. The available options are:
- Best Fit - Automatically adjusts the screen resolution for the best visual experience.
- Scaled - Displays the target desktop with the resolution of the admin computer
- Original - Displays the target desktop at its own resolution
- Full screen - Displays the remote desktop in full-screen view
The multi-screen icon only appears if the target point endpoint has a multi-monitor setup. The drop-down shows all monitors connected to the endpoint and allows you to choose which to view.
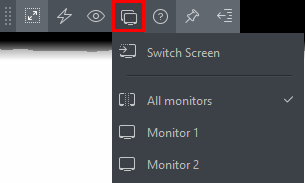
Select 'Switch Screen' to move to the next screen on the list
Click the life-preserver icon in the side menu to open the support center:
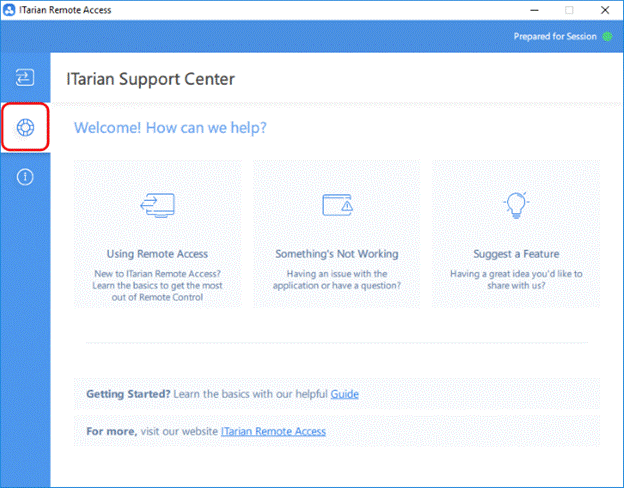
View articles which explain how to perform tasks in Itarian Remote Access.
Submit a support ticket. Read knowledgebase articles.
Visit the ITarian community message board and share your thoughts.
We hope you learned a lot from this article. You can totally rely on the ITarian remote management tools as its functions will multiply your team’s efforts across several client networks. It will simply revolutionize any MSP business. There are more features you should check out today. If you any more questions, visit ITarian on the Web at https://www.itarian.com/ or call (973) 859 4000 ext 3025 about a live demo.