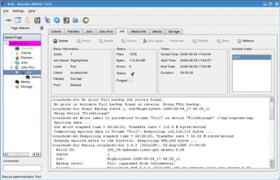
Bacula setup may be a client-server backup model that allows you to recover your computer system's data. It is an open-source program that supports major operating systems like Linux, macOS, Windows, and a broad spectrum of backup devices.
Let us take a look at the components and prerequisites before jumping into the bacula installation.
Components of Bacula
It subdivides into two parts, bacula server, and bacula client. What is Bacula Server? The Bacula Server, also known as, Backup server, further subdivides into three core parts. These are:
Bacula Directory
It controls and restores the operations in the server. The Bacula Console enables you to interact with the Bacula Directory.

Bacula Storage Daemon (SD)
It reads and writes on the storage devices.
Bacula Catalog
It maintains the database files that have backed up. Bacula works with SQL databases such as MySQL and PostgreSQL.
The second part is the Bacula Client. It is the server to be backed up. It runs a File Daemon component (FD) that gives you server access to the data back up.
Minimum System Requirements of Bacula Setup
This Bacula setup uses a MySQL database and Ubuntu 20.04 for bacula installation. Ensure there is sufficient disk storage for the server to initiate backups. A 2GB RAM will do. Now move on to how to install bacula on ubuntu 20.04
Steps to Install Bacula
Step 1: Install MySQL
To get started with the bacula install, update the system by running:
apt-get update -y
Wait for the packages to update, then install a MySQL server by running
apt-get install mysql-server
The computer will prompt you for the MySQL database administrative user's password. Enter and confirm the password while remembering it for Bacula installation.
Step 2: Install Bacula
The Bacula setup package is available in the Ubuntu 20.04 repository by default. Run the following commands:
apt-get install bacula -y
While installing Bacula, you will be asked to configure Postfix.
Pick "Internet Site" under 'General Type of Mail Configuration.' Next, key in your server's FQDN or hostname.
If prompted for 'Configure database for bacula-director-mysql with dbconfig-common?' Enter "Yes." For 'Password of the database's administrative user,' key in the MySQL root password you created during MySQL installation.
Lastly, enter and confirm a new password for 'MySQL application password for bacula-director-mysql' or generate a random password by leaving the prompt blank. You can then update the Bacula script permissions in readiness for the catalog backup job.
Configure Bacula Storage
After installing the Bacula server and client, the next step is to create a backup directory. Run
mkdir /backup
Then, change the directory's ownership, granting it bacula user and group permissions. To do this, run the command:
chown -R bacula:bacula /backup
Next, edit the Bacula default storage and configuration file, defining the storage location and the device.
nano /etc/bacula/bacula-sd.conf
You can as well use another editor such as vi in place of nano.
You should comment out other "Device" by running:
                        Device {
                        Name = Local-device
                        Media Type = File
                        Archive Device = /backup
                        LabelMedia = yes;
                        Random Access = Yes;
                        AutomaticMount = yes;
                        RemovableMedia = no;
                        AlwaysOpen = no;
                        Maximum Concurrent Jobs = 5
                        }
Save the changes, close then restart the storage by running:
systemctl restart bacula-sd.service
Configure Backup Director
The next step is to edit the Bacula configuration file then provide the storage location. Run this command:
nano /etc/bacula/bacula-dir.conf
Next, configure file, local storage, file set, and local jobs as follows:
                        Storage {
                        Name = ubuntu2004-sd
                        Address = 127.0.0.1
                        Device = Local-device
                        Media Type = File
                        }

                        FileSet {
                        Name = "Local-file"
                        Include {
                        Options {
                        signature = MD5
                        }
                        File = /etc
                        }
                        }
                        Schedule {
                        Name = "LocalDaily"
                        Run = Full daily at 05:00
                        }

                        Job {
                        Name = "LocalBackup"
                        JobDefs = "DefaultJob"
                        Enabled = yes
                        Level = Full
                        FileSet = "Local-file"
                        Schedule = "LocalDaily"
                        Storage = ubuntu2004-sd
                        }
Verify Backup
Now that you have installed and configured Bacula set up to run daily at 5:00, run
bconsole
and get an output informing you that the Director localhost is connected. You can start the backup by running
*run
If prompted to select a backup job, select option 2 (LocalBackup) and hit enter, starting backup job.
Type
*status
After confirming that everything works perfectly, exit the console by running
*exit
And the bacula setup is complete.
Conclusion
After having access to an SQL database, an appropriate operating system with sufficient disk size for backup, you can proceed with the Bacula setup. First, install the MySQL database after doing preliminary updates.
Next, install bacula while paying attention to storage, file sets, and job backups. Lastly, confirm that everything runs well and exit the system.